
Hello all! Today I'm going to talk through the process of making my British bra. Many many hours of hand sewing went into this bra in an attempt to make the insides look as good as possible.
Firstly, the thread I used for this project was an old Dewhurst Sylko wooden reel found in the back of a cupboard. It's labelled as a silk substitute made in Great Britain with fast dye. The shade is D.25 Violet, which luckily contrasts beautifully with my bra fabric. The silk substitute is likely to be rayon or polyester and the dye used was definitely a chemical one. Unfortunately the thread is the only product that I have had to compromise on so far as none appears to be manufactured from start to finish in the UK and be able to be used on a sewing machine. Of course I could have used the fibres from my fabric and sewed it all by hand, but I don't have the time to for that to be an option, so a thread that was at least partially manufactured in Great Britain was as close as I could get for this item of clothing. I will be exploring different thread options with the other garments still to be made as part of this project.

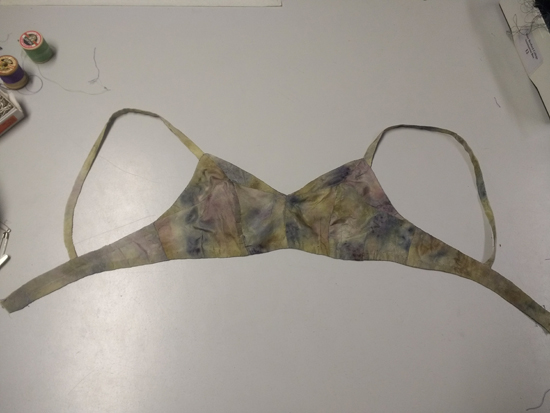
When it came to cutting out in the final fabric I was very conscious of where I placed my pattern pieces and tried to keep the splotches of colour as evenly spaced as possible. The sewing lines were tacked in place using the aforementioned thread.


Below shows where the excess was pinned out. The new lines were tacked in and resewn.

To finish the inside edges I folded the SA once and then again to hide the raw edge, and this fold was slipstitched down. In retrospect they do look a bit wide and I wonder whether I could have made them any smaller and more delicate. To finish the bottom edge I used a strip of self-fabric bias binding. I understitched it by hand because I didn't want the sewing machine to warp the delicate silk. The bias binding was then folded up twice and slipstitched into place.


Lauren xx